To help members of the UCLA community manage Zoom security concerns, we recommend the following steps for using Zoom while working and learning remotely.
Download Zoom Security Settings (PDF) opens a new window
Zoom web application:
-You can create a UCLA Zoom account from the Zoom at UCLA opens a new window website.
-Before you sign-in to host a meeting, you must first set-up the meeting and properly adjust your Zoom security settings using the Zoom web application.
-Instructions to set-up a secure Zoom meeting using the web application are below.
Zoom desktop application:
The desktop app can be downloaded to your Mac or Windows computer from the Zoom at UCLA opens a new window website.
Recommendations:
-For instructors and meeting hosts:
-After you have set-up the meeting and adjusted the Zoom security settings using the web application, you are strongly encouraged to then use the Zoom desktop application instead to conduct the meeting.
-Recording a Zoom lecture or meeting requires the use of the desktop app.
-We now allow Cloud Recording and will be encouraging it. We’re currently testing an integration that will move Cloud Recordings from Zoom to a video repository (Kaltura) that is integrated with Bruin Learn.
-Zoom is also integrated with Bruin Learn, so instructors can also schedule their Zoom sessions from within Bruin Learn.
-For meeting participants (that is, those not hosting Zoom sessions):
-Participants may safely join lectures or meetings using either the desktop application or the web application.
If you haven't already, visit Zoom at UCLA opens a new window to download the desktop application.
If you have already downloaded the Zoom desktop application, you need to ensure that you are running the current version.
Follow these steps to check for the current version.
1. Open the Zoom application.
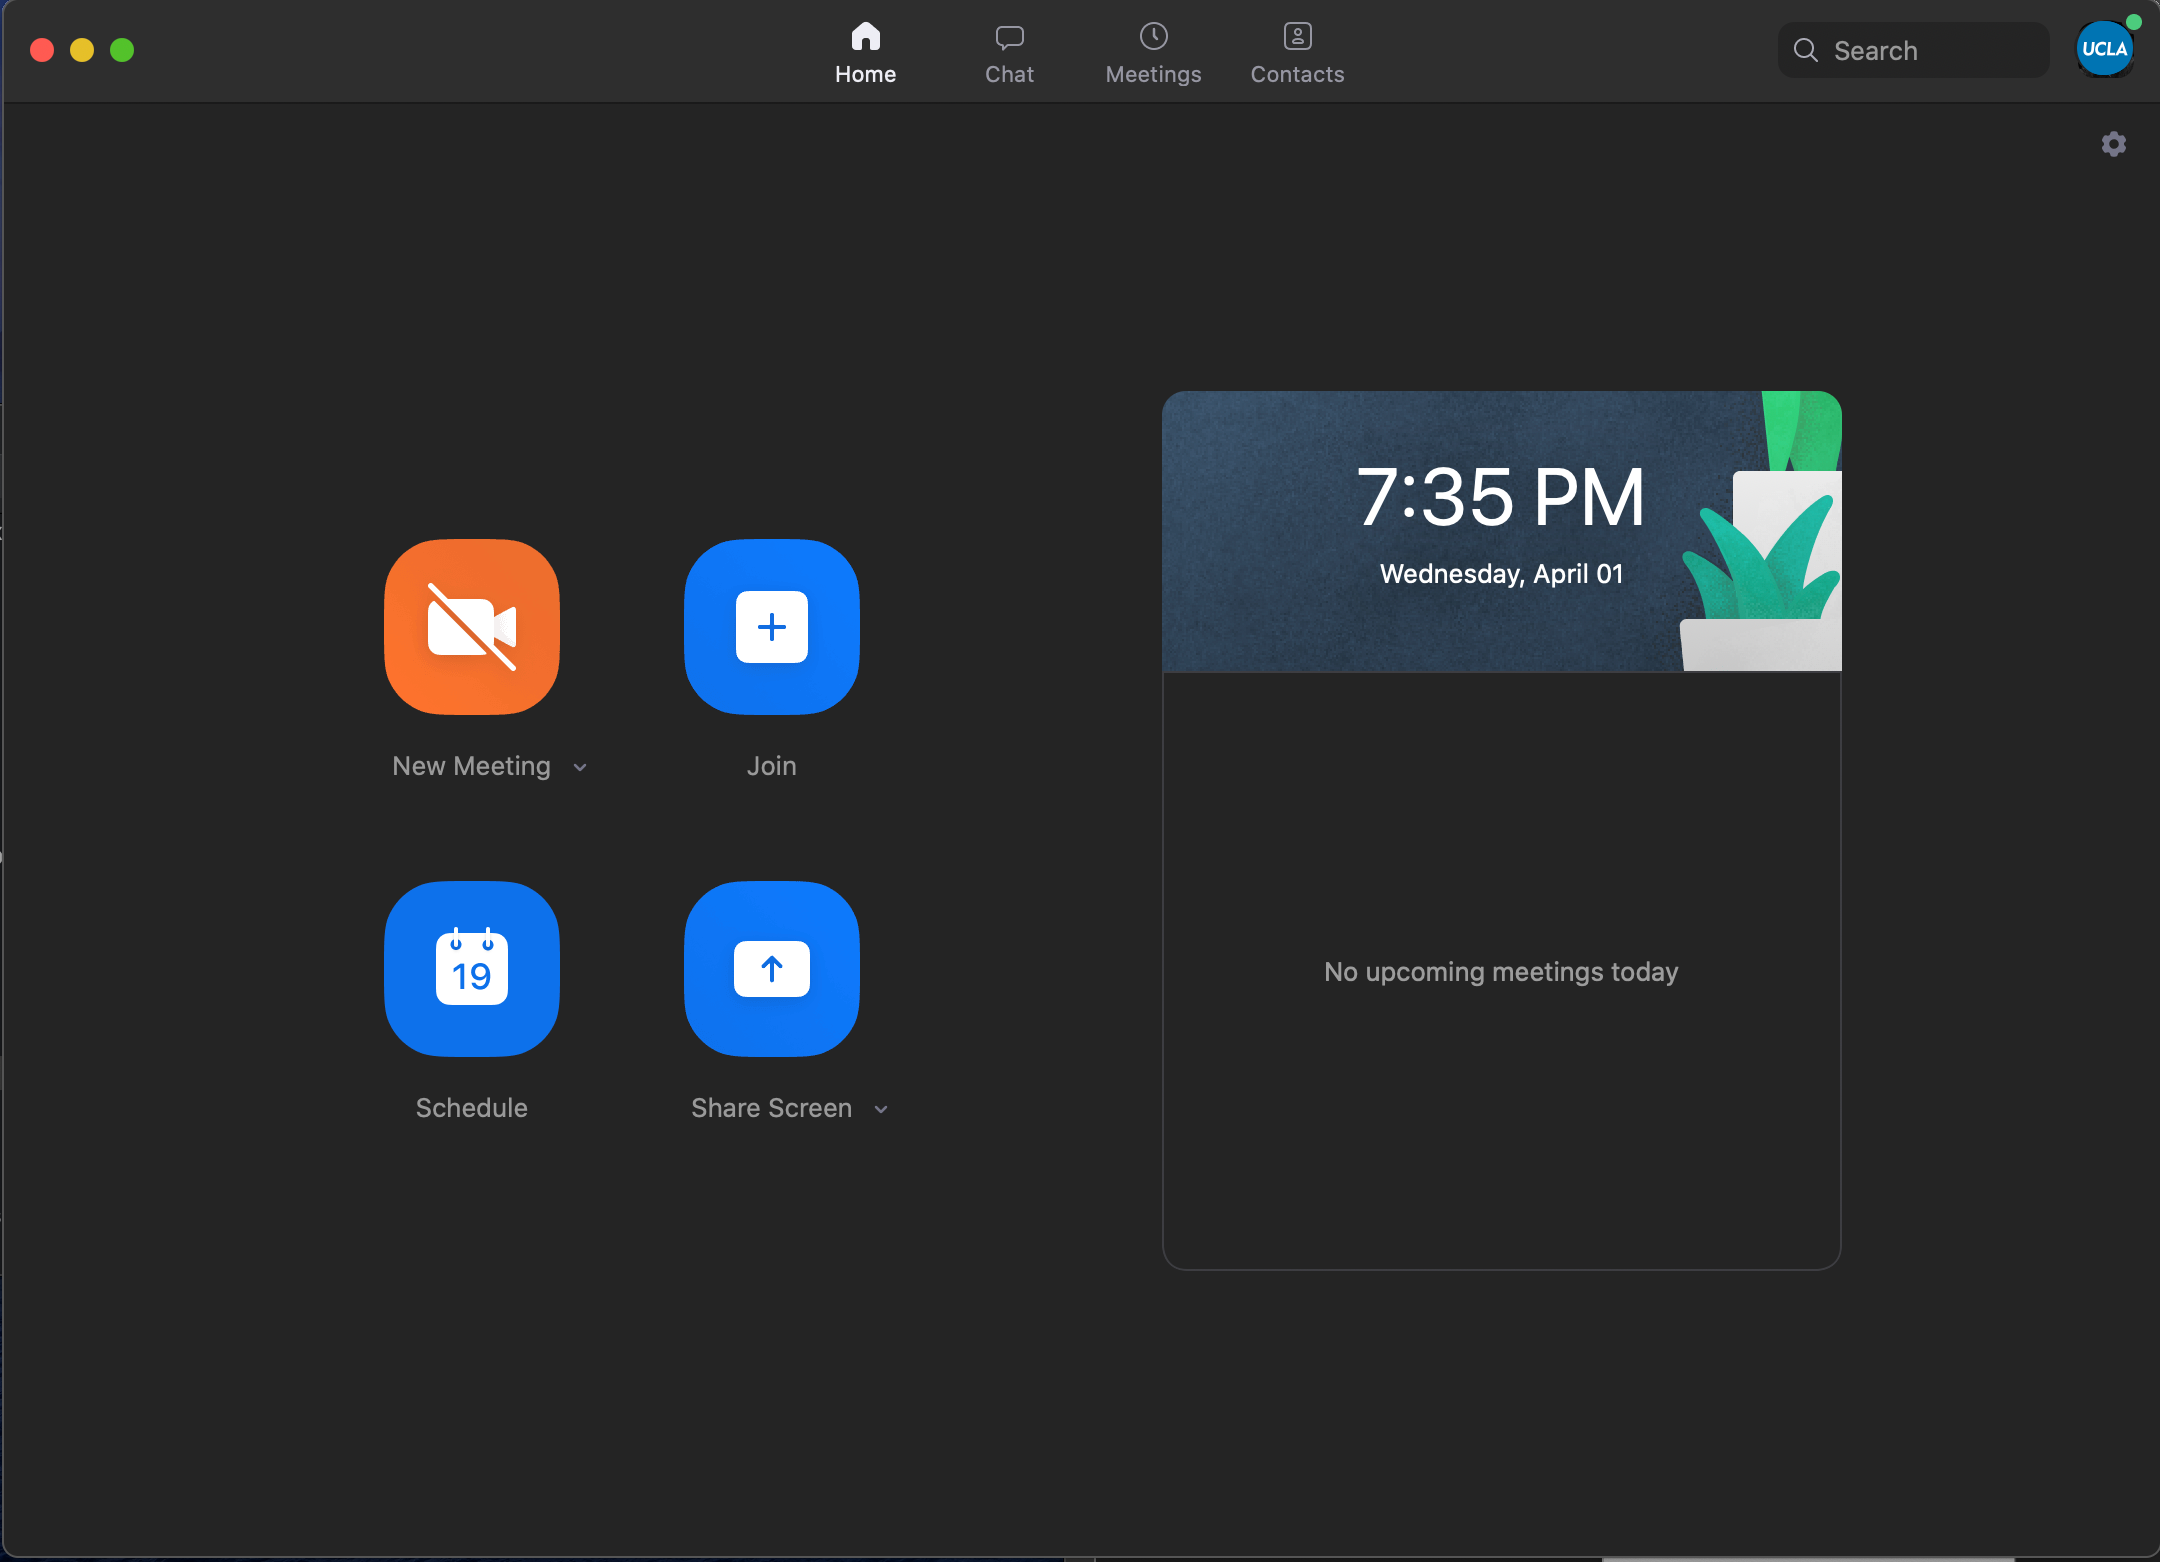
2. Click on your profile in the upper right-hand corner of the Zoom application.
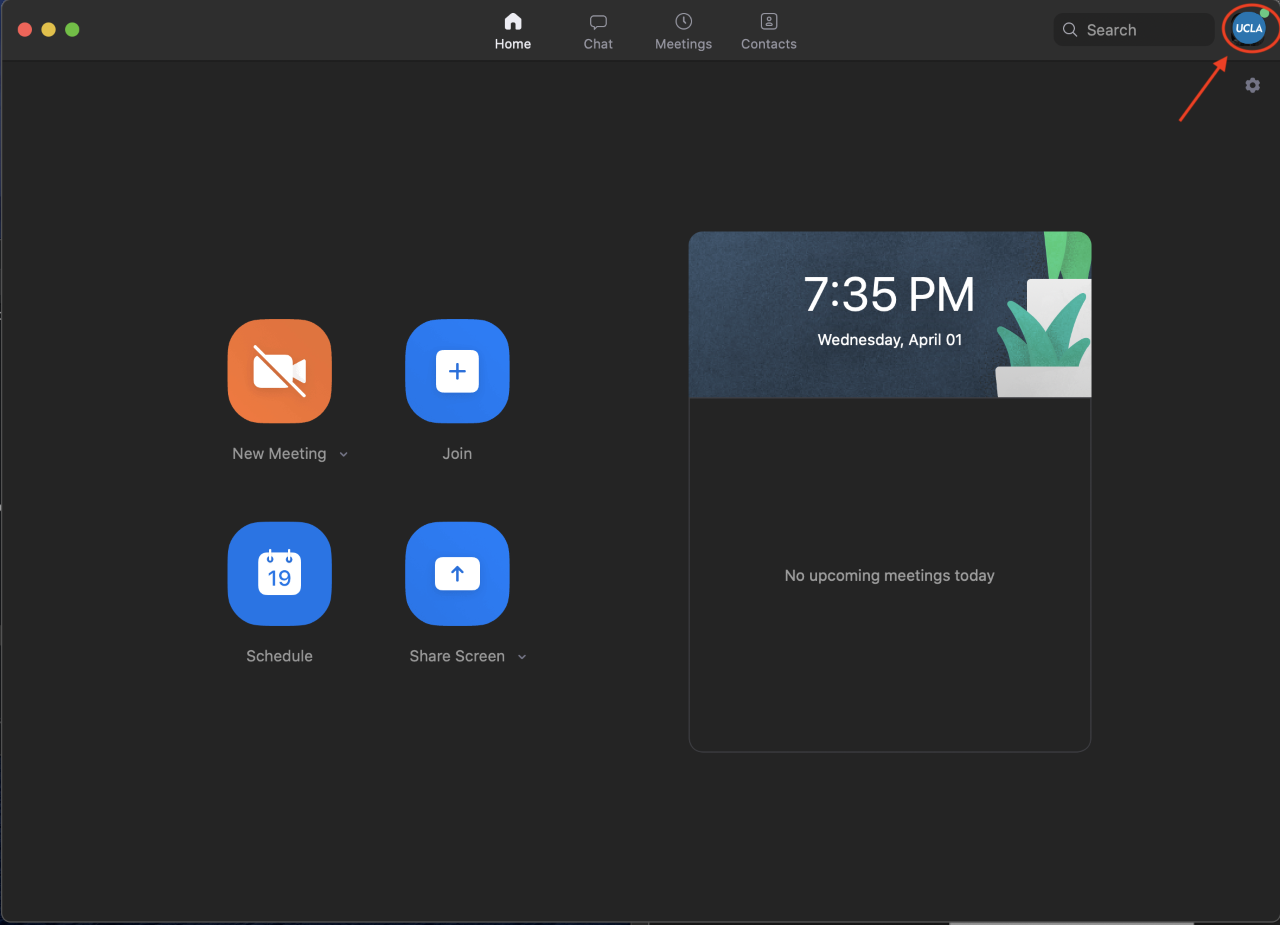
3. Select "Check for Updates" from the dropdown menu.
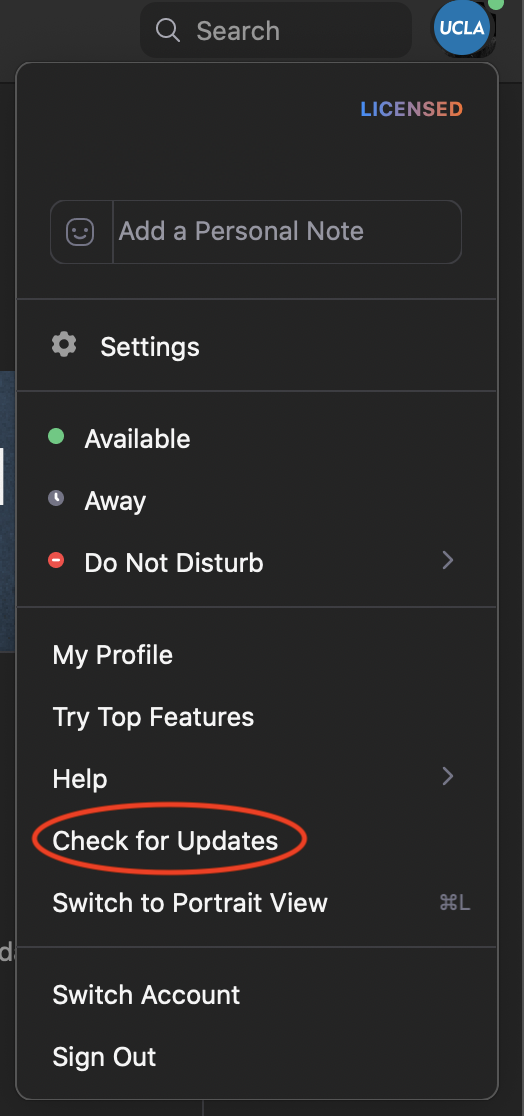
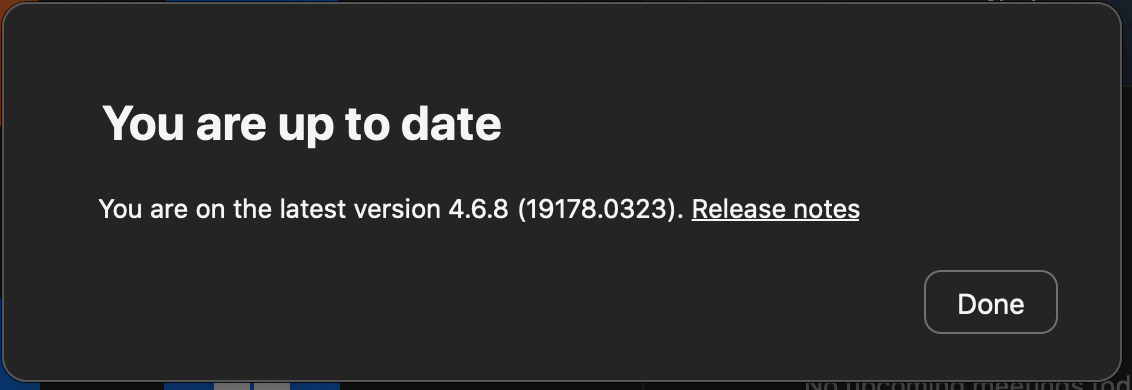
4. If a new version is available you will get a notification to update; otherwise, you should see the following.
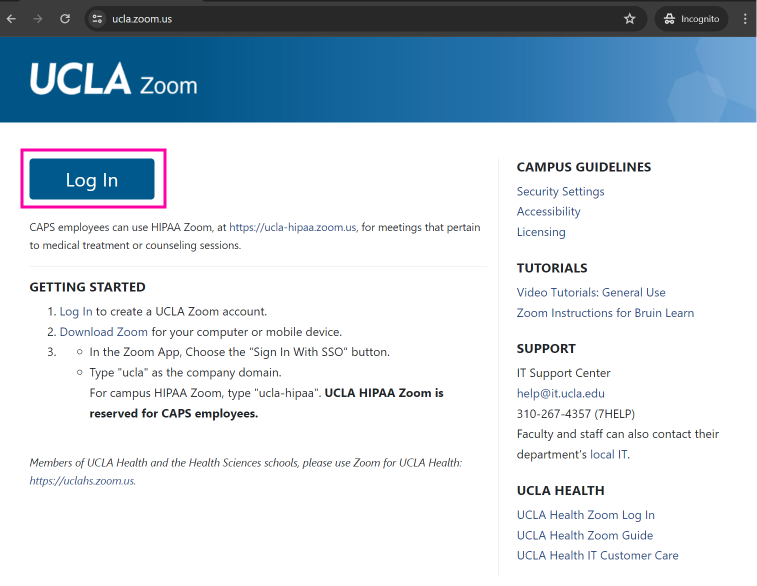
1. Log into the Zoom web application. You can log-in from Zoom at UCLA opens a new window or at ucla.zoom.us opens a new window. You will be prompted for your UCLA Logon credentials and Duo authentication.
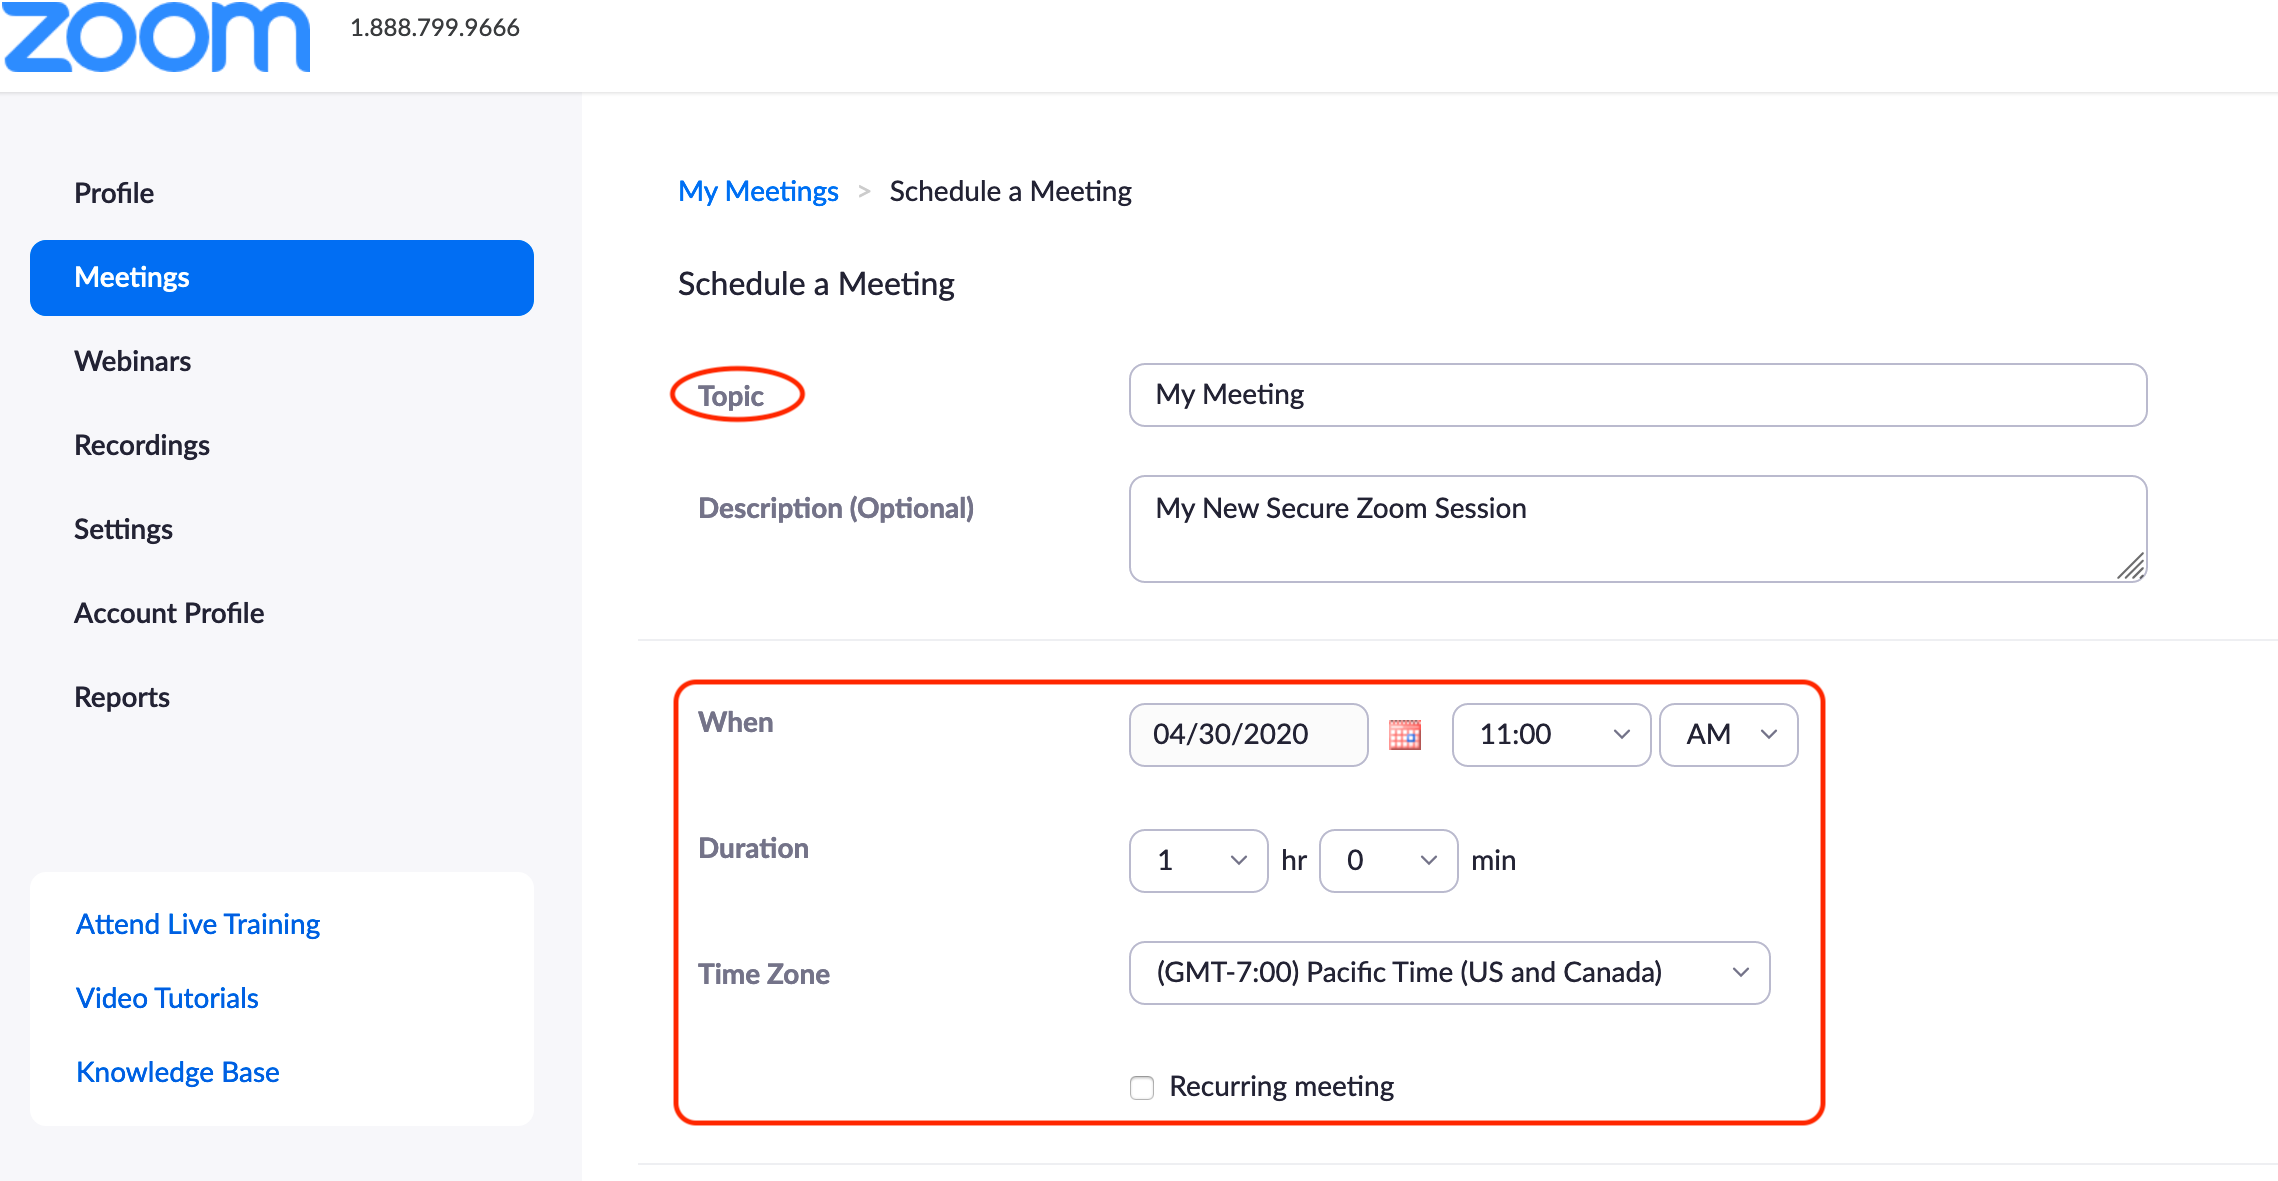
2. Schedule a new meeting. To schedule your meeting, start by selecting “Schedule a Meeting.”

3. Naming and setting the date. The first options you should set are the meeting topic and the schedule for the meeting. If you would like to add a description for the class or meeting, you may, but it is not necessary.
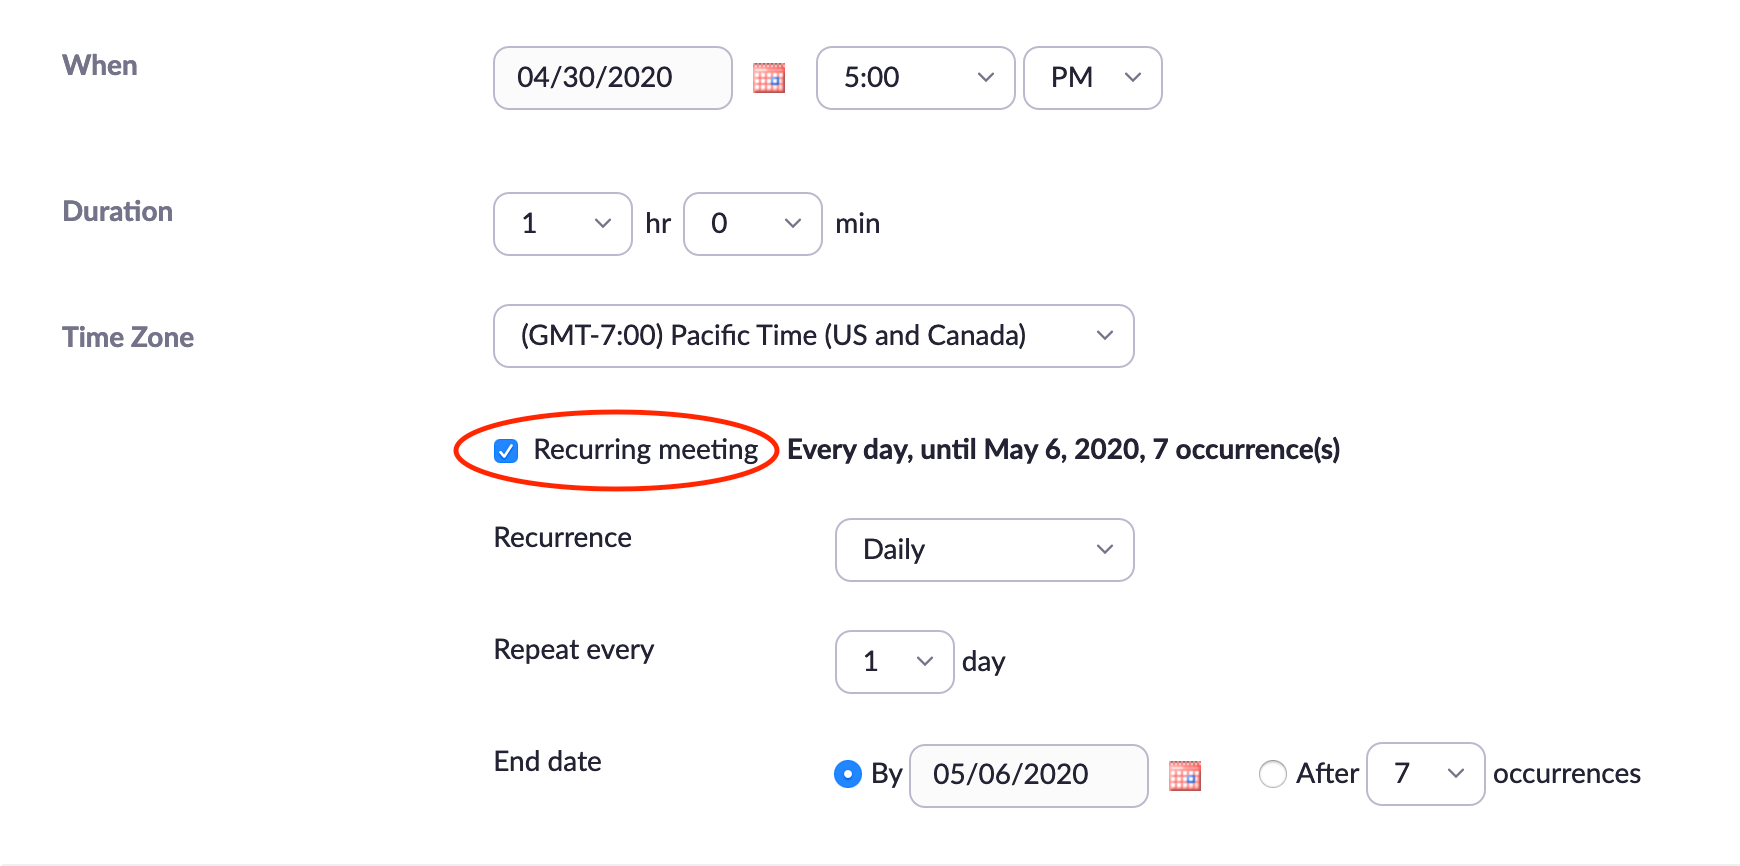
4. Creating a recurring meeting (optional). If you would like the meeting to be a recurring meeting, check the box next to “Recurring meeting” and enter the details for the recurrence.
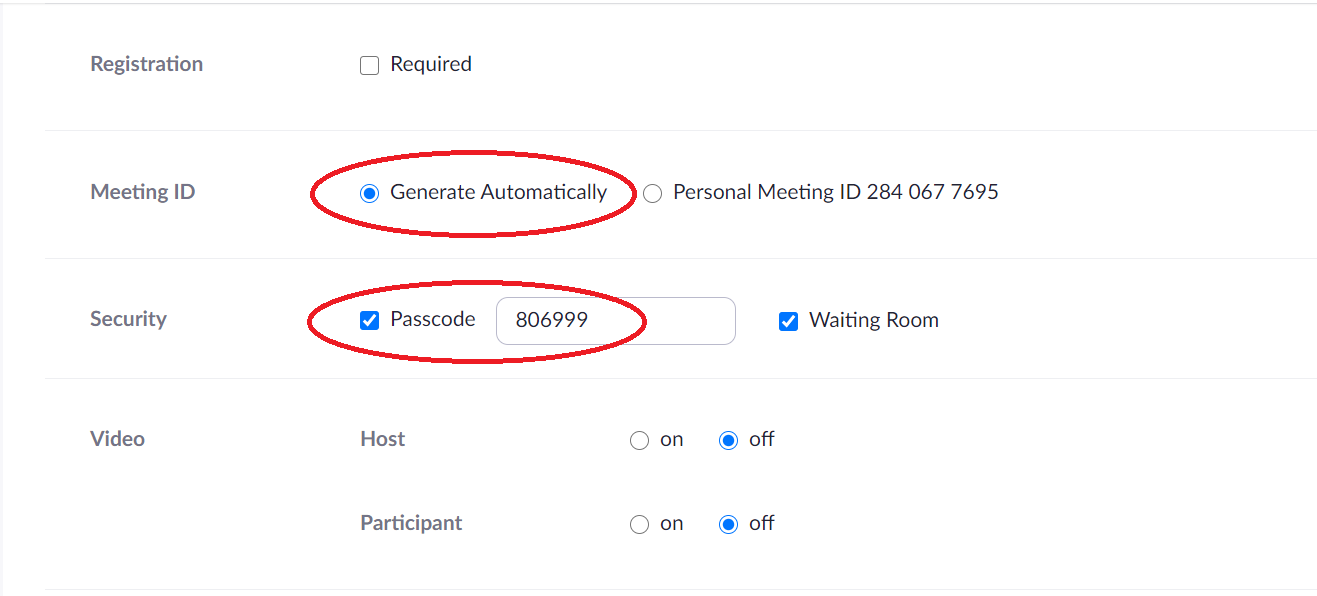
5. Meeting ID and meeting passcode. Next to Meeting ID, the button for “Generate Automatically” should already be checked. We do not recommend using your Personal Room for general sessions. Next to Security, a “Passcode” will be generated for you. You can change the passcode, but we recommend that you keep it as a numeric sequence.
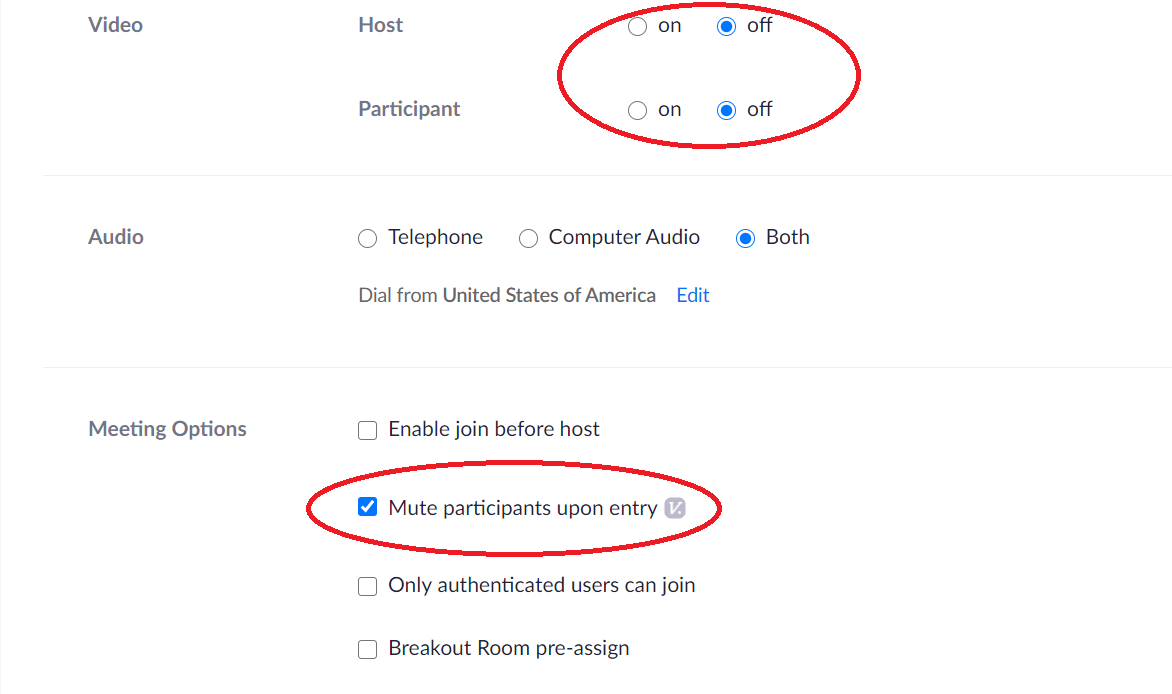
6. Check video settings and mute participants on entry. When scheduling the meeting, ensure that video is off for both host and participants. You should also ensure that “Mute participants on entry” is checked.
7. Alternative Hosts. Finally, if your meeting has a co-host, add the co-host’s email in the “Alternative Hosts” field. You can add multiple co-hosts by entering their email addresses separated by commas (for example: joebruin@ucla.edu(link sends email), josiebruin@ucla.edu(link sends email)).
Important note: The host and all co-hosts have the same privileges in meetings. A faculty member or meeting chair must be the host or co-host, even when a teaching assistant or other assistant is creating and managing the Zoom session.

8. Save your meeting. Click “Save,” and you will see a confirmation that your meeting has been created.

9. Send participants the information they need to join your meeting. You can send participants a link that they can click to join your meeting by highlighting and copying the text next to “Join URL.” If you are using CCLE to share the information, we recommend that you add the join URL to your CCLE site (i.e. Turn editing on > select a section > Section tools > URL.).
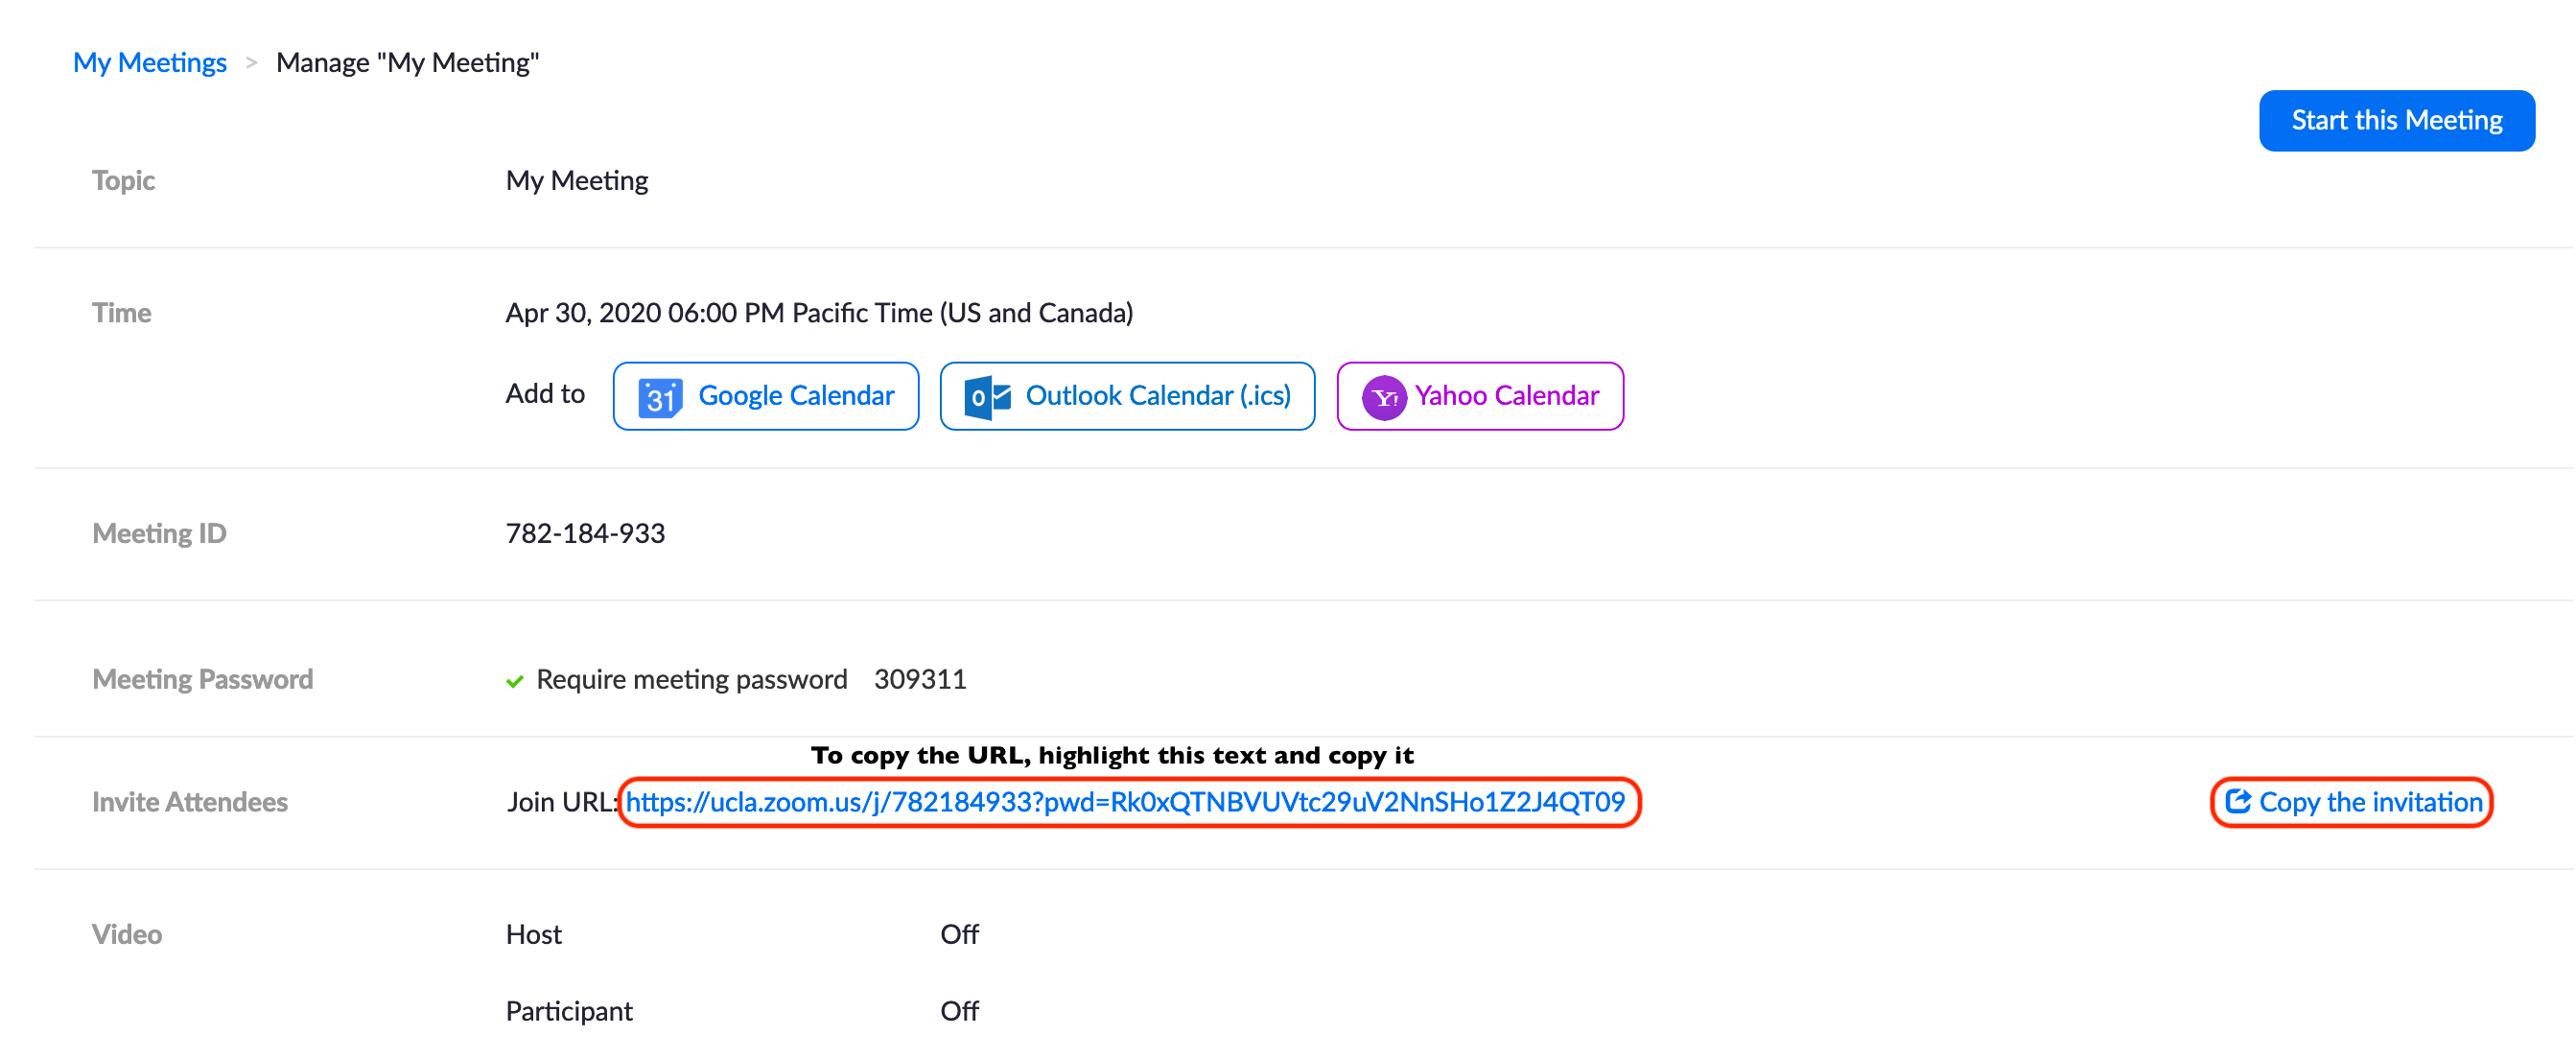
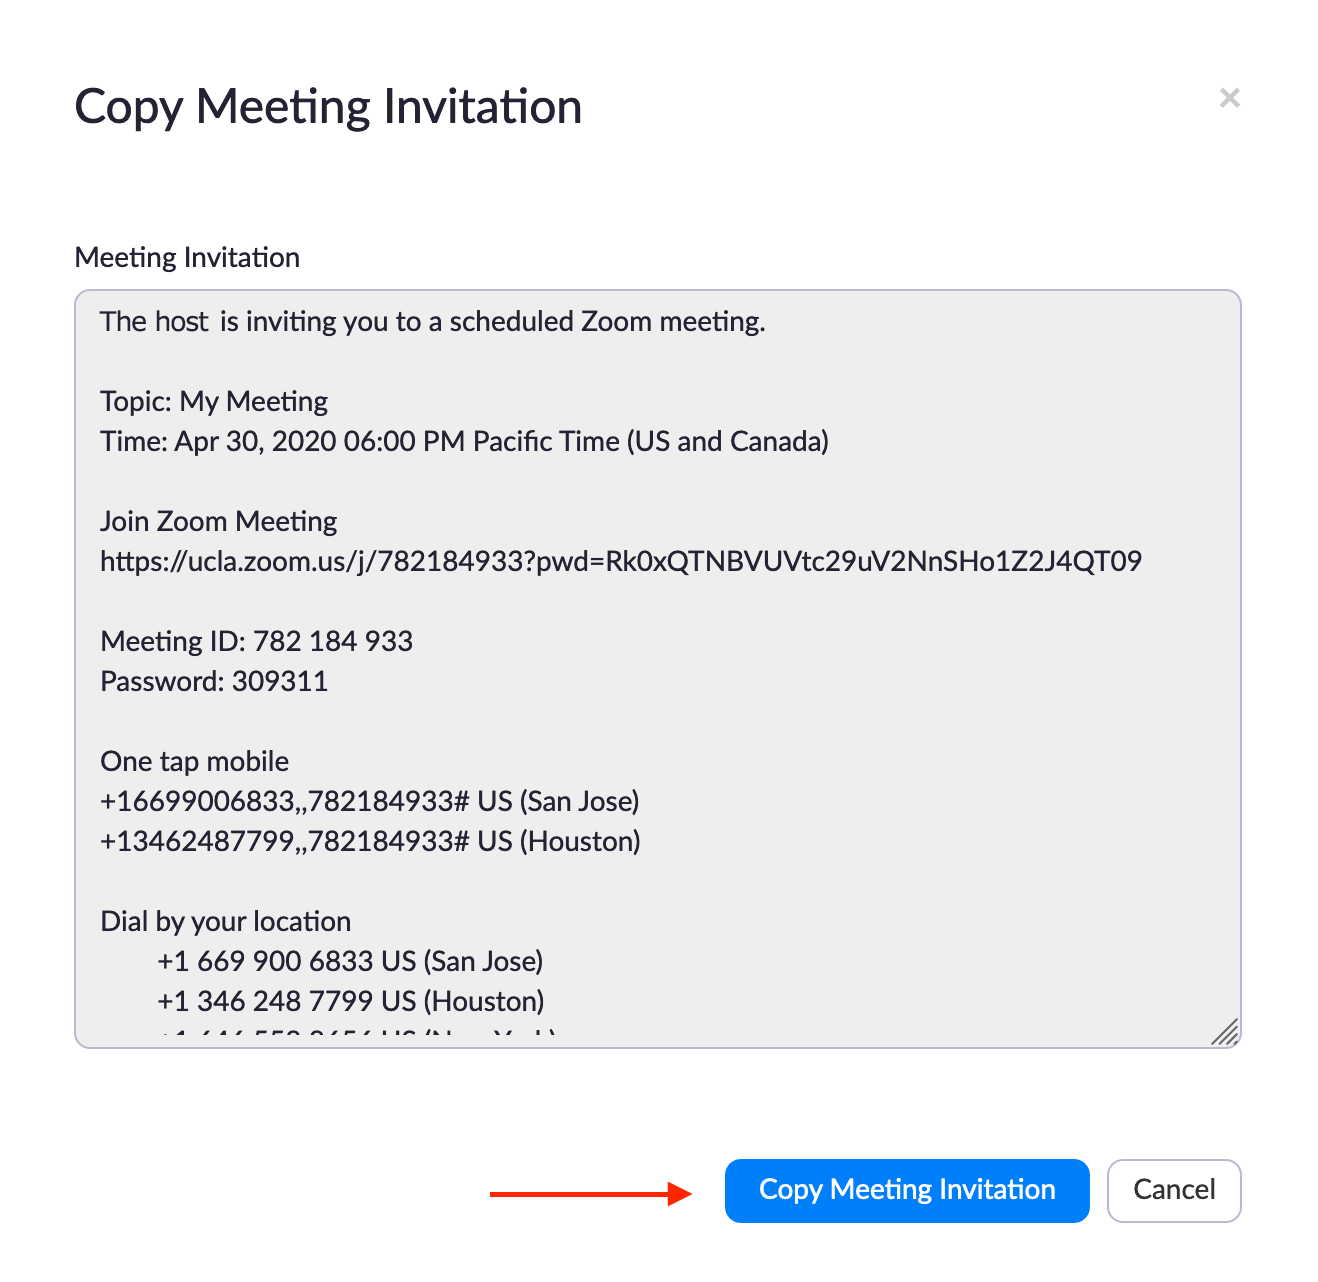
10. Copy the invitation. Alternatively, you can send the text of the complete meeting invitation by clicking on “Copy the invitation” (see image above). When you click “Copy the invitation,” another window will pop up and allow you to copy the invitation details. You can then send the copied text to participants or post them in CCLE
11. Waiting room options. Once you have saved your meeting, you must make a change in your profile settings. You only have to change this setting once unless you decide to change it again later. Begin by clicking “Settings” on the left side of your screen (i.e., Settings> Security> Waiting Room Options
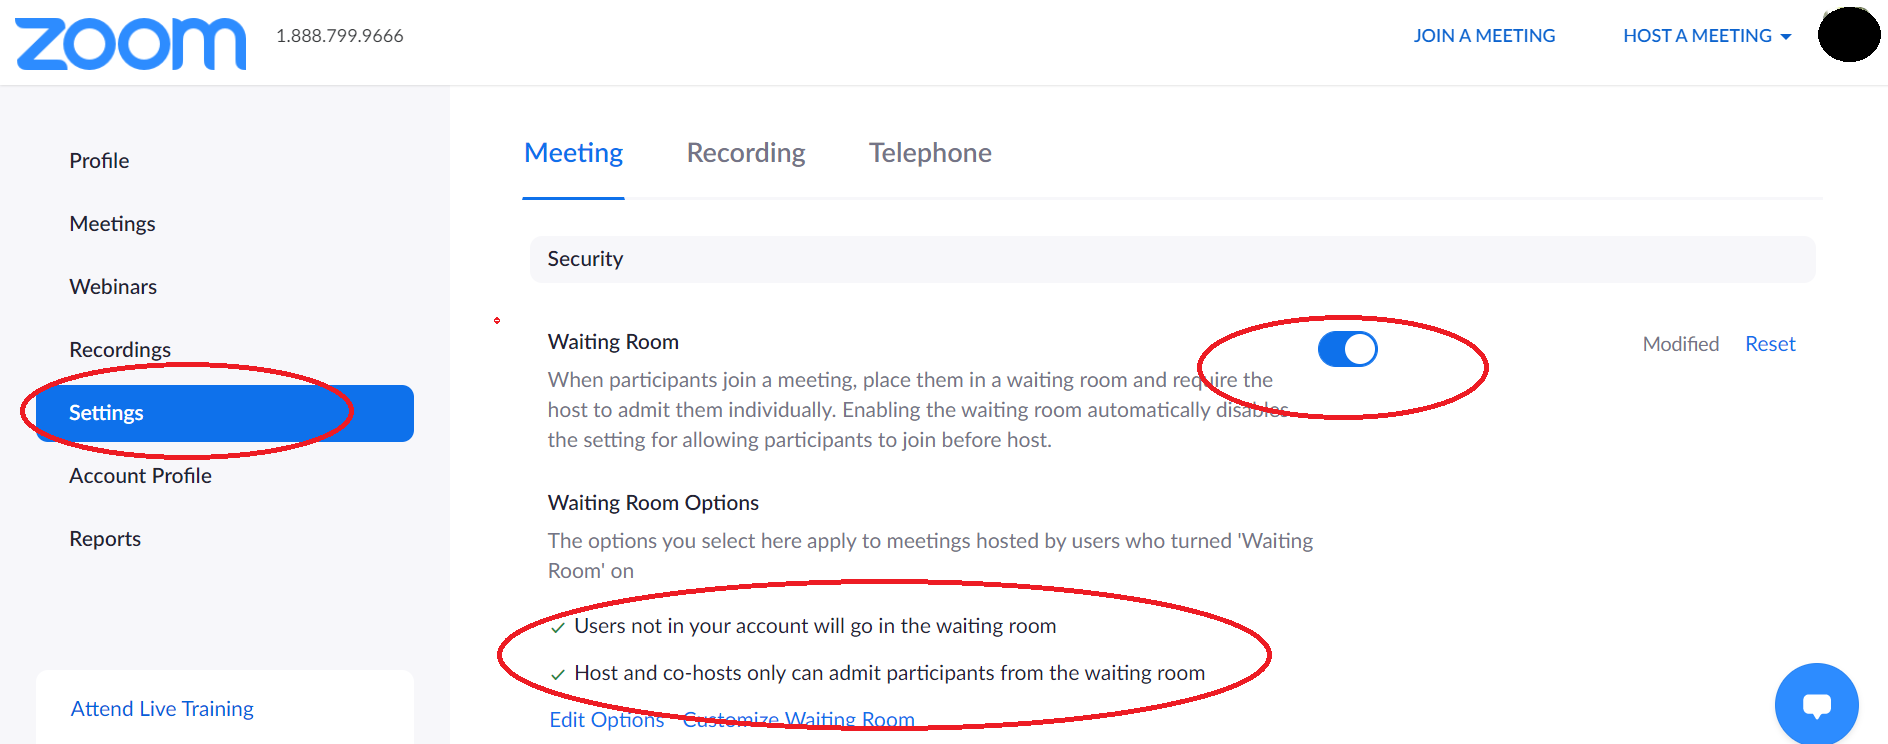
This will ensure that any user who is logged in using an account from ucla.zoom.us will automatically join your meeting, and it will keep all other users held in the waiting room until you admit them.
1. Initiate the meeting. We recommend that you initiate and host meetings using the Zoom desktop application (Windows and Mac users). You must use the Zoom desktop application if you are recording a session.
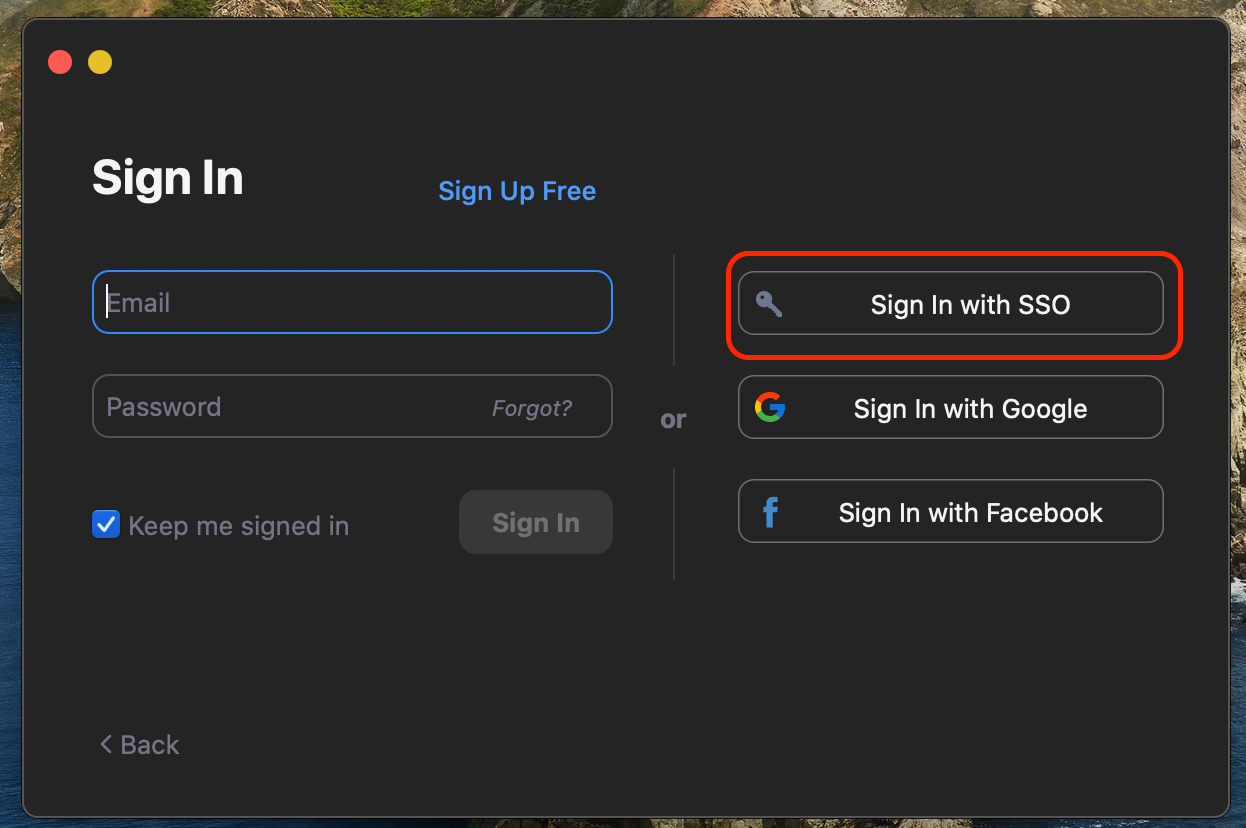
a. Start the Zoom desktop app: To use the desktop app, you may be asked to log-in. Select the “Sign in with SSO” option to ensure you are using the ucla.zoom.us account.
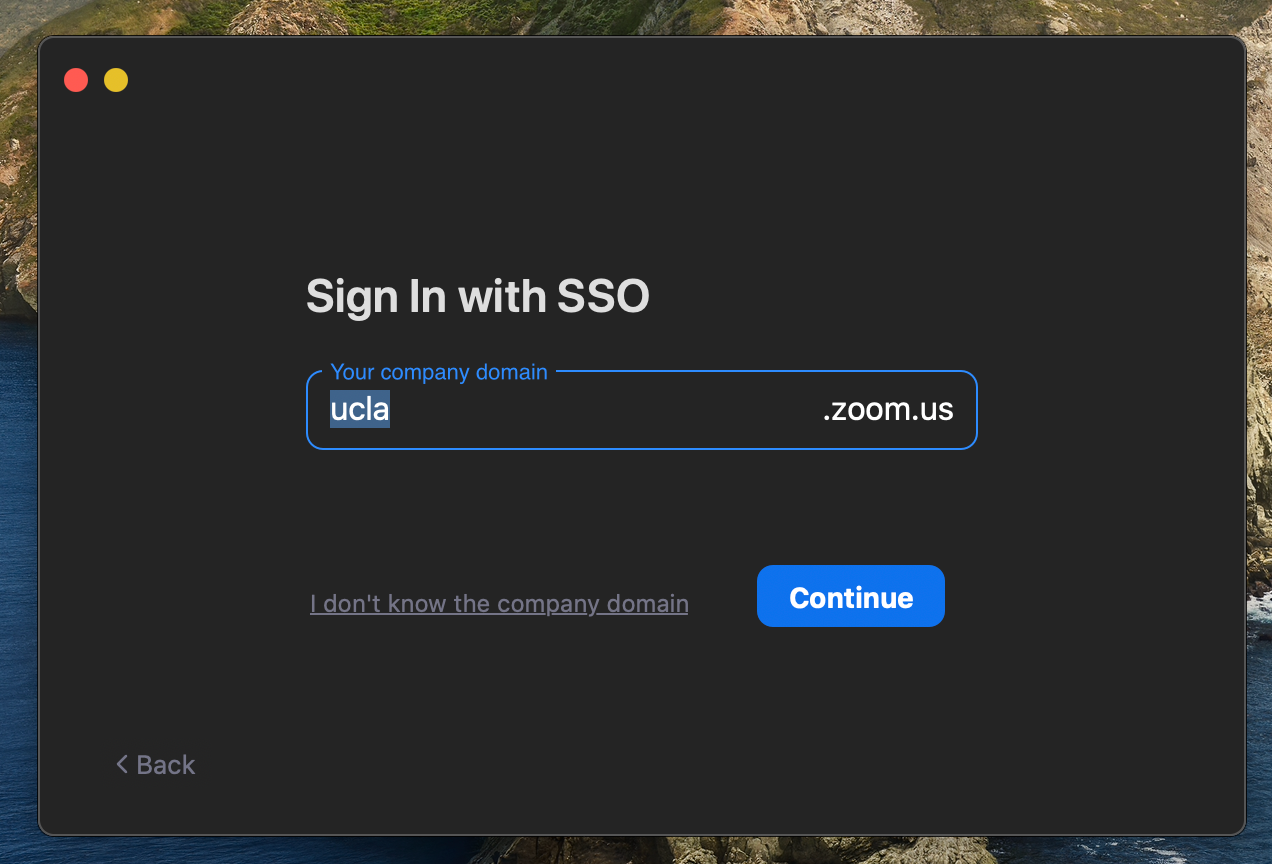
b. UCLA domain: A dialog box will ask for your company domain, which is "UCLA". If the field is empty, type “ucla” in the box and click “Continue.”
2. Begin the meeting. We recommend that the host begin the meeting a few minutes prior to the scheduled start time to allow for managing participants.
a. To start the meeting, click on the “Start” button beside the meeting name.
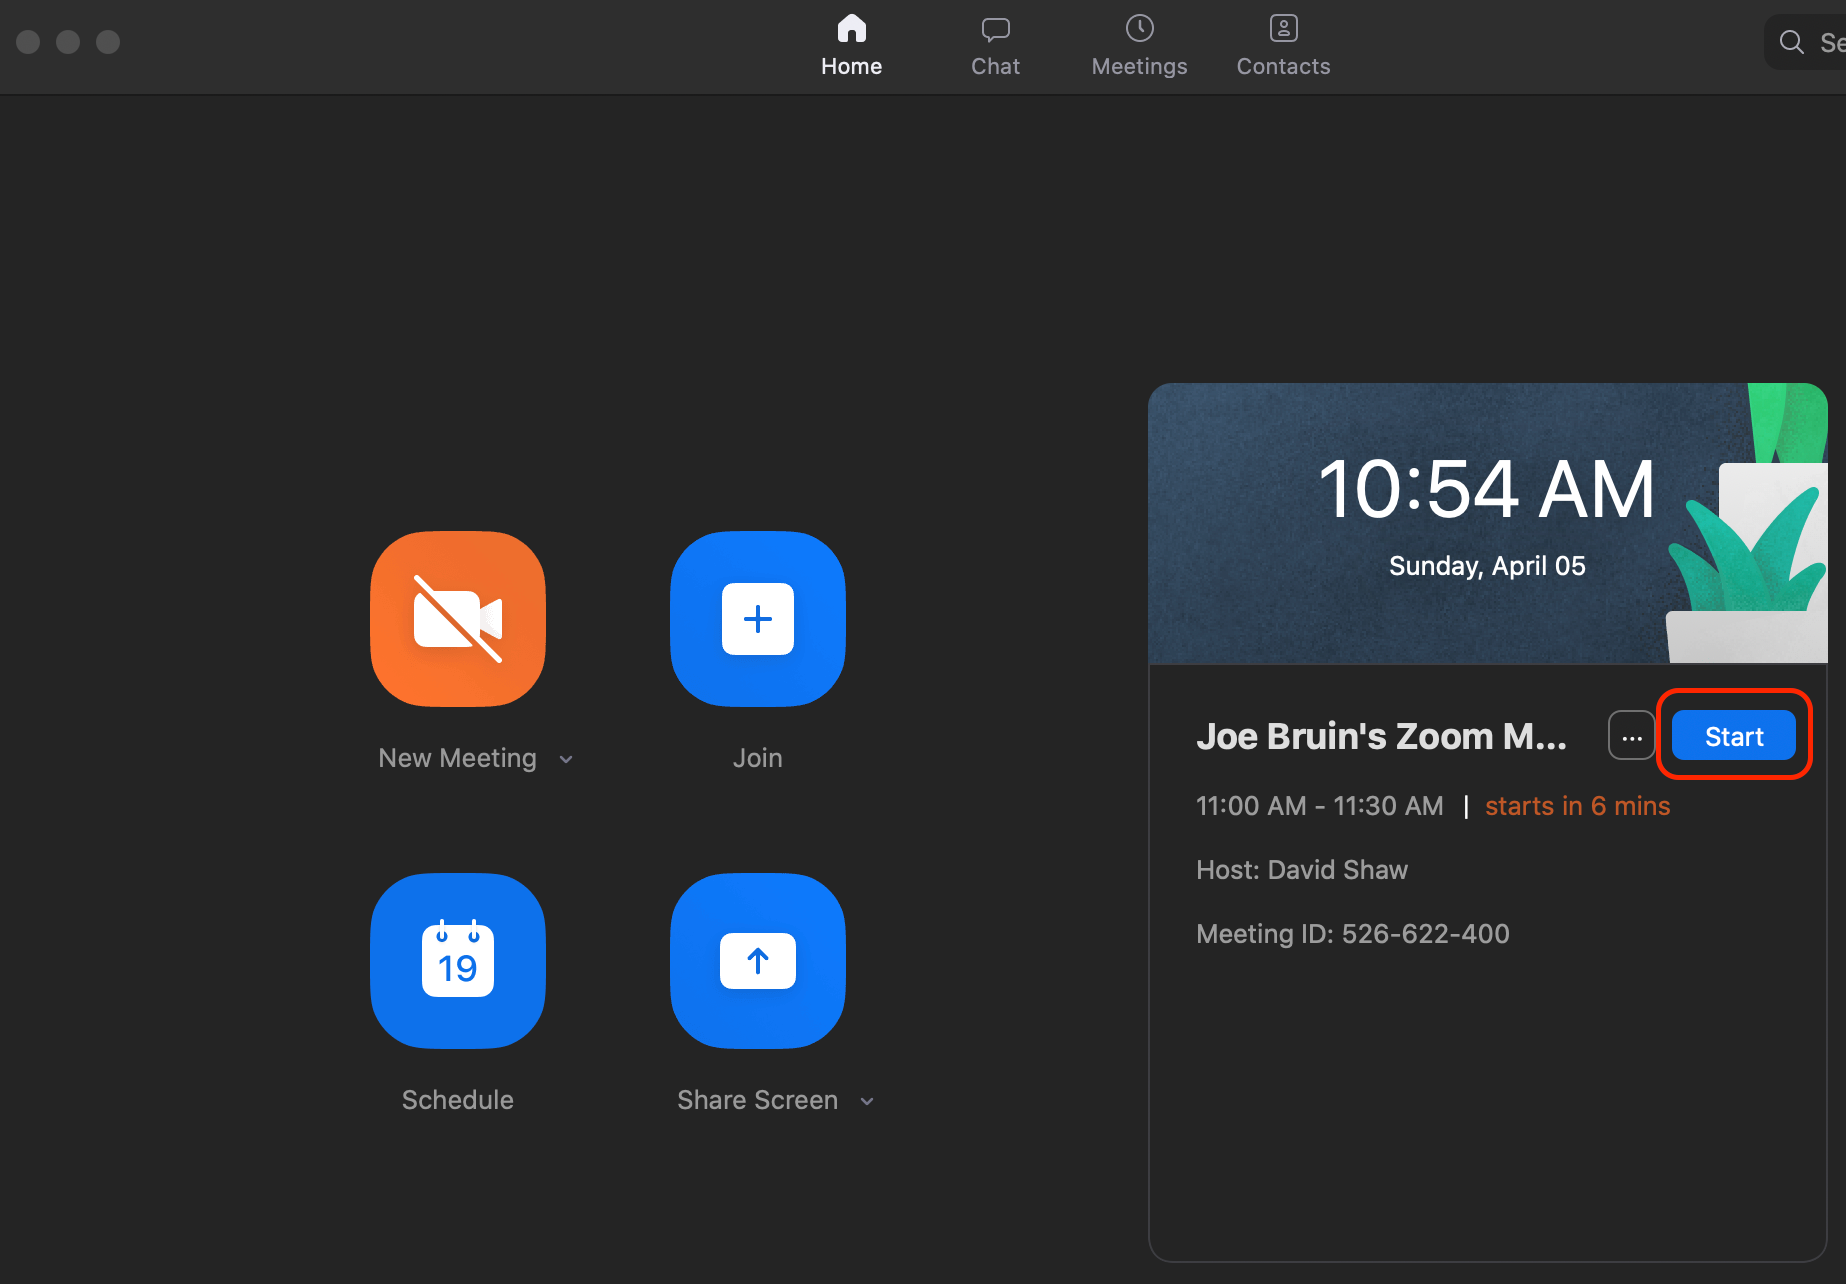
b. If the meeting does not appear on the main screen, click on the “Meetings” button at the top of the desktop application.

3. Mute participants in meeting. After beginning the meeting, the host should select “Manage Participants” at the bottom of the meeting window.

a. This will open the Participants pane on the right-side of the application window.
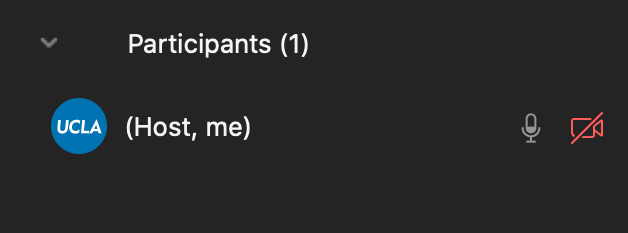
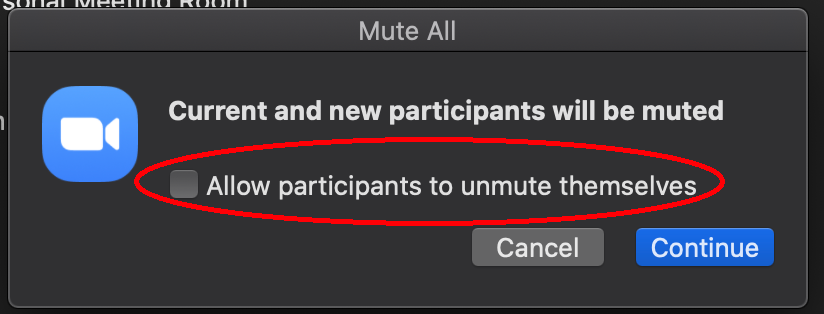
b. Select the “Mute All” button.

c. A dialog box will pop up. Make sure that the “Allow participants to unmute themselves” box is unchecked, and then select “Continue.”
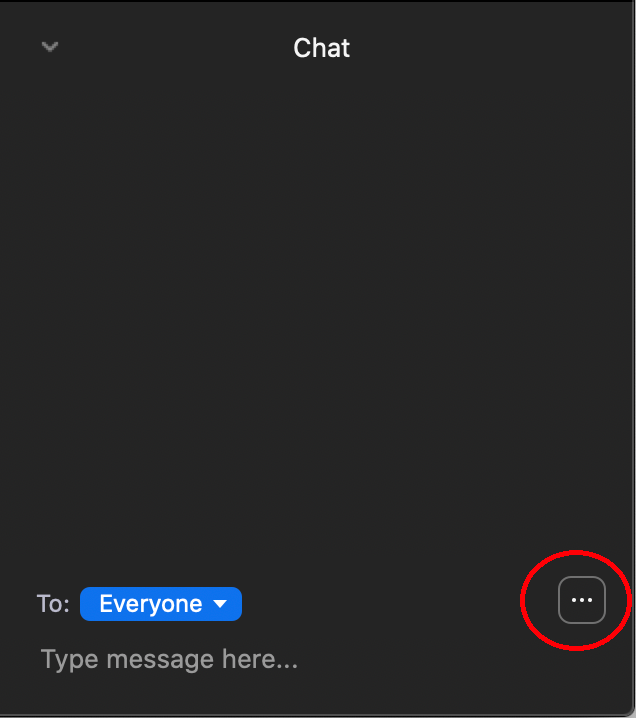
4. Limit Chat. Next, select “Chat” at the bottom of the Zoom meeting window. This will open a separate chat window.

a. At the lower left-side of the chat window, you will see a box with a “…” symbol. Click that box.
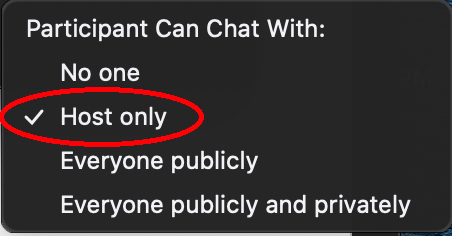
b. Make sure “Host Only” is checked. This will only allow participants to chat with the host to protect the session from unwanted chatter.
Once these options have been set, you are ready for your meeting to start.
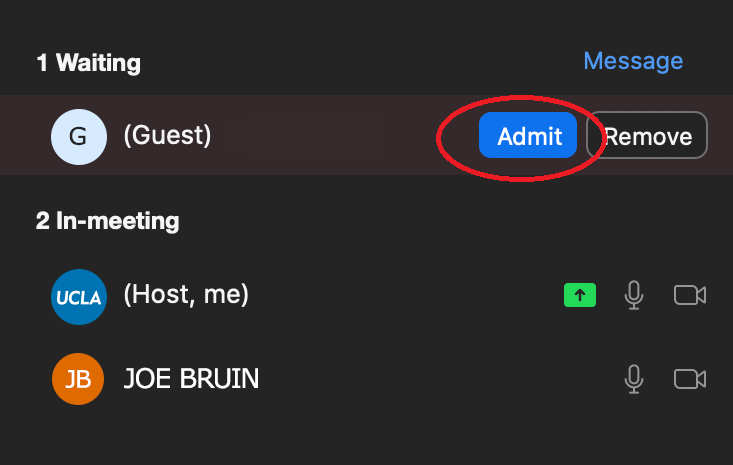
As participants start to join the meeting, those who are using a ucla.zoom.us account will be placed directly in the meeting.
Those who are not will be shown as “waiting” in the Participants window.
-To admit someone who is waiting, simply click the “Admit” button.
-If you do not recognize a participant who is waiting, you can either leave them in the waiting room or click the “Remove” button.
Remember: Only hosts or co-hosts can move individuals from the waiting room to the class or meeting.
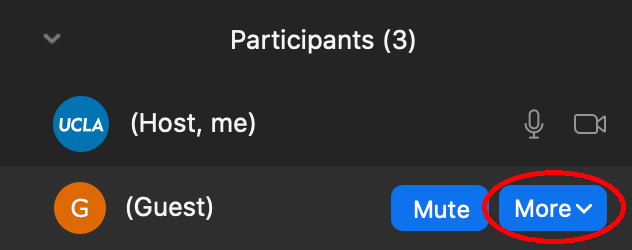
If you have a participant who starts their video and displays objectionable content, you can quickly terminate that user’s video.
1. Open "Manage Participants."

2. Move your cursor to the offender’s name in the "Participants" pane. Next to the participant’s name, you will see two buttons. Click on the "More" button.
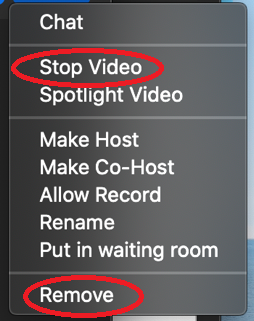
3. From the drop down menu you can select "Stop Video" or, if necessary, you can select "Remove."
"Stop Video" does not remove the participant but does restrict their ability to restart their video. The host can restart that participant’s video if desired.
"Remove" will open a dialog box, asking you to confirm the action. If you do, the user will be removed and not be able to rejoin the meeting.
These recommendations will significantly reduce any participant's ability to disrupt your meeting.
As the host, you will need to actively monitor participants and deal with any disruptive behavior.
One additional step you can take is to turn off participants video as they join, using the steps outlined above for unruly participants. When the host turns off the video, the participant cannot restart the video.
You should also ensure that “Mute participants on entry” and “Enable waiting room” are both checked.
If you are having a meeting and you experience a disruption or an uninvited guest, email Security(link sends email) as soon as possible so the matter can be investigated further.
Additionally, anyone who experiences a bias incident should report it by completing a UCLA Incident of Bias Reporting Form opens a new window.
Zoom also offers other options that may be value for meeting hosts, including:
1. Lock the meeting opens a new window. When you lock a Zoom Meeting after it has started, no new participants can join, even if they have the meeting ID and password (if you have required one).
-In the meeting, click “Participants” at the bottom of your Zoom window.
-In the Participants pop-up, click the “Lock Meeting” button.
2. Put them on hold opens a new window. You can put each participant on a temporary hold, including the attendees’ video and audio connections.
-Click on someone’s video thumbnail and select “Start Attendee On Hold” to activate this feature.
-Click “Take Off Hold” in the Participants list if and when you’re ready to have them back.
